
The hardest part of painting your nails

When applying nail lacquer one of the hardest part is painting your natural writing hand, so it’s good tip is to start painting this hand first. This allows you to feel the flow of the varnish and you are also less likely to catch or mark the nails when painting the other hand. Another tip is DON’T RUSH! Allowing plenty of time in-between coats for the varnish to set, creates a better smoother finish.
Don’t be tempted to paint right up to the cuticles as chances are the nail polish will catch the cuticle and it can look messy. If this happens then the perfect solution is to use FINGA-NAILS ~ NAIL VARNISH CORRECTOR PEN to clean away any excess easily with your good hand!
The three stroke technique
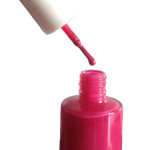 Three strokes are all you need. Shake the bottle to ensure the varnish is lubricant . To ensure you apply a consistent amount of varnish every time, swipe one side of the brush against the bottle rim to remove the excess from one side of the brush.
The aim is to let the varnish do the majority of the work. Dot a decent-size bead of polish at the base of the nail and sweep the brush up the centre of the nail. Place the brush back to the same point and sweep to the right and up, and finally from the left side and up . This technique blends the varnish and compliments the main centre stroke.
Don’t be tempted to go over this straight away with another coat. Applying a thin first coat will lead to a better second coat and a more professional finish. Wait AT LEAST two minutes before applying a second coat using the same technique. The heavier the coat the longer it takes to cure and the easier it is ruin the overall finish.
Finishing Touch
And finally for a harder and more protective finish seal the manicure with Vitry ~ GEL EFFECT TOPCOAT.